Salted CX can automatically handle your emails, respond to customers and help users within Salted CX to interact with the customer via email.
You need to allow Salted CX to handle your email in the following steps:
- Identify an email address you want Salted CX to handle such as [email protected], [email protected] or similar. Salted CX will process all incoming emails to that address and use the address for sending emails. You can connect Salted CX to multiple emails.
- Enable Salted CX to send emails from your email address on you behalf.
- Forward incoming email messages from your infrastructure to Salted CX.
You can easily revoke Salted CX using your email address if you change your mind.
How Salted CX Uses the Email
Salted CX sends emails on your behalf from the address when:
- A human agent sends the customer an email message.
- AI sends an email message to a customer based on received customer message.
For each sent message, Salted CX sets the response value to the same email. This means that the customers can always respond to the email they receive from Salted CX.
This setup includes enabling DKIM, SPF, and DMARC to ensure the deliverability of your email, and it is handled as authentic and verified by email clients. Salted CX listens for bounced emails (emails that do not find a recipient) and marks the corresponding message turns in the customer journey as failed.
Email Behavior
Salted CX never uses “no reply” email addresses. Each message sent from Salted CX allows the customer to reach back. We believe this is a proper behavior for any company that values its customers and enables them to tie any follow-up conversation to outbound messages.
Brand Setup
Make sure you choose an email address that can be used exclusively by Salted CX to avoid unexpected behavior.
DNS Setup
DNS setup enables us to send emails on your behalf. Please contact Salted CX to obtain the information needed to set up DNS.
Forward Incoming Emails to Salted CX
You need to forward emails from your email provider (such as Gmail or Outlook) to Salted CX so they appear in Live Conversations. The setup depends on the email provider.
Google Workspace
You can use these Google-provided instructions as a reference or follow them for guidance.
Follow these steps to enable forwarding:
- Go to Default Routing Settings in Your Google Workspace Admin, log in when asked. Alternatively you can open the Default Routing Settings from Admin Console by clicking Apps
 ⏵ Google Workspace
  ⏵ Gmail
  ⏵ Default Routing
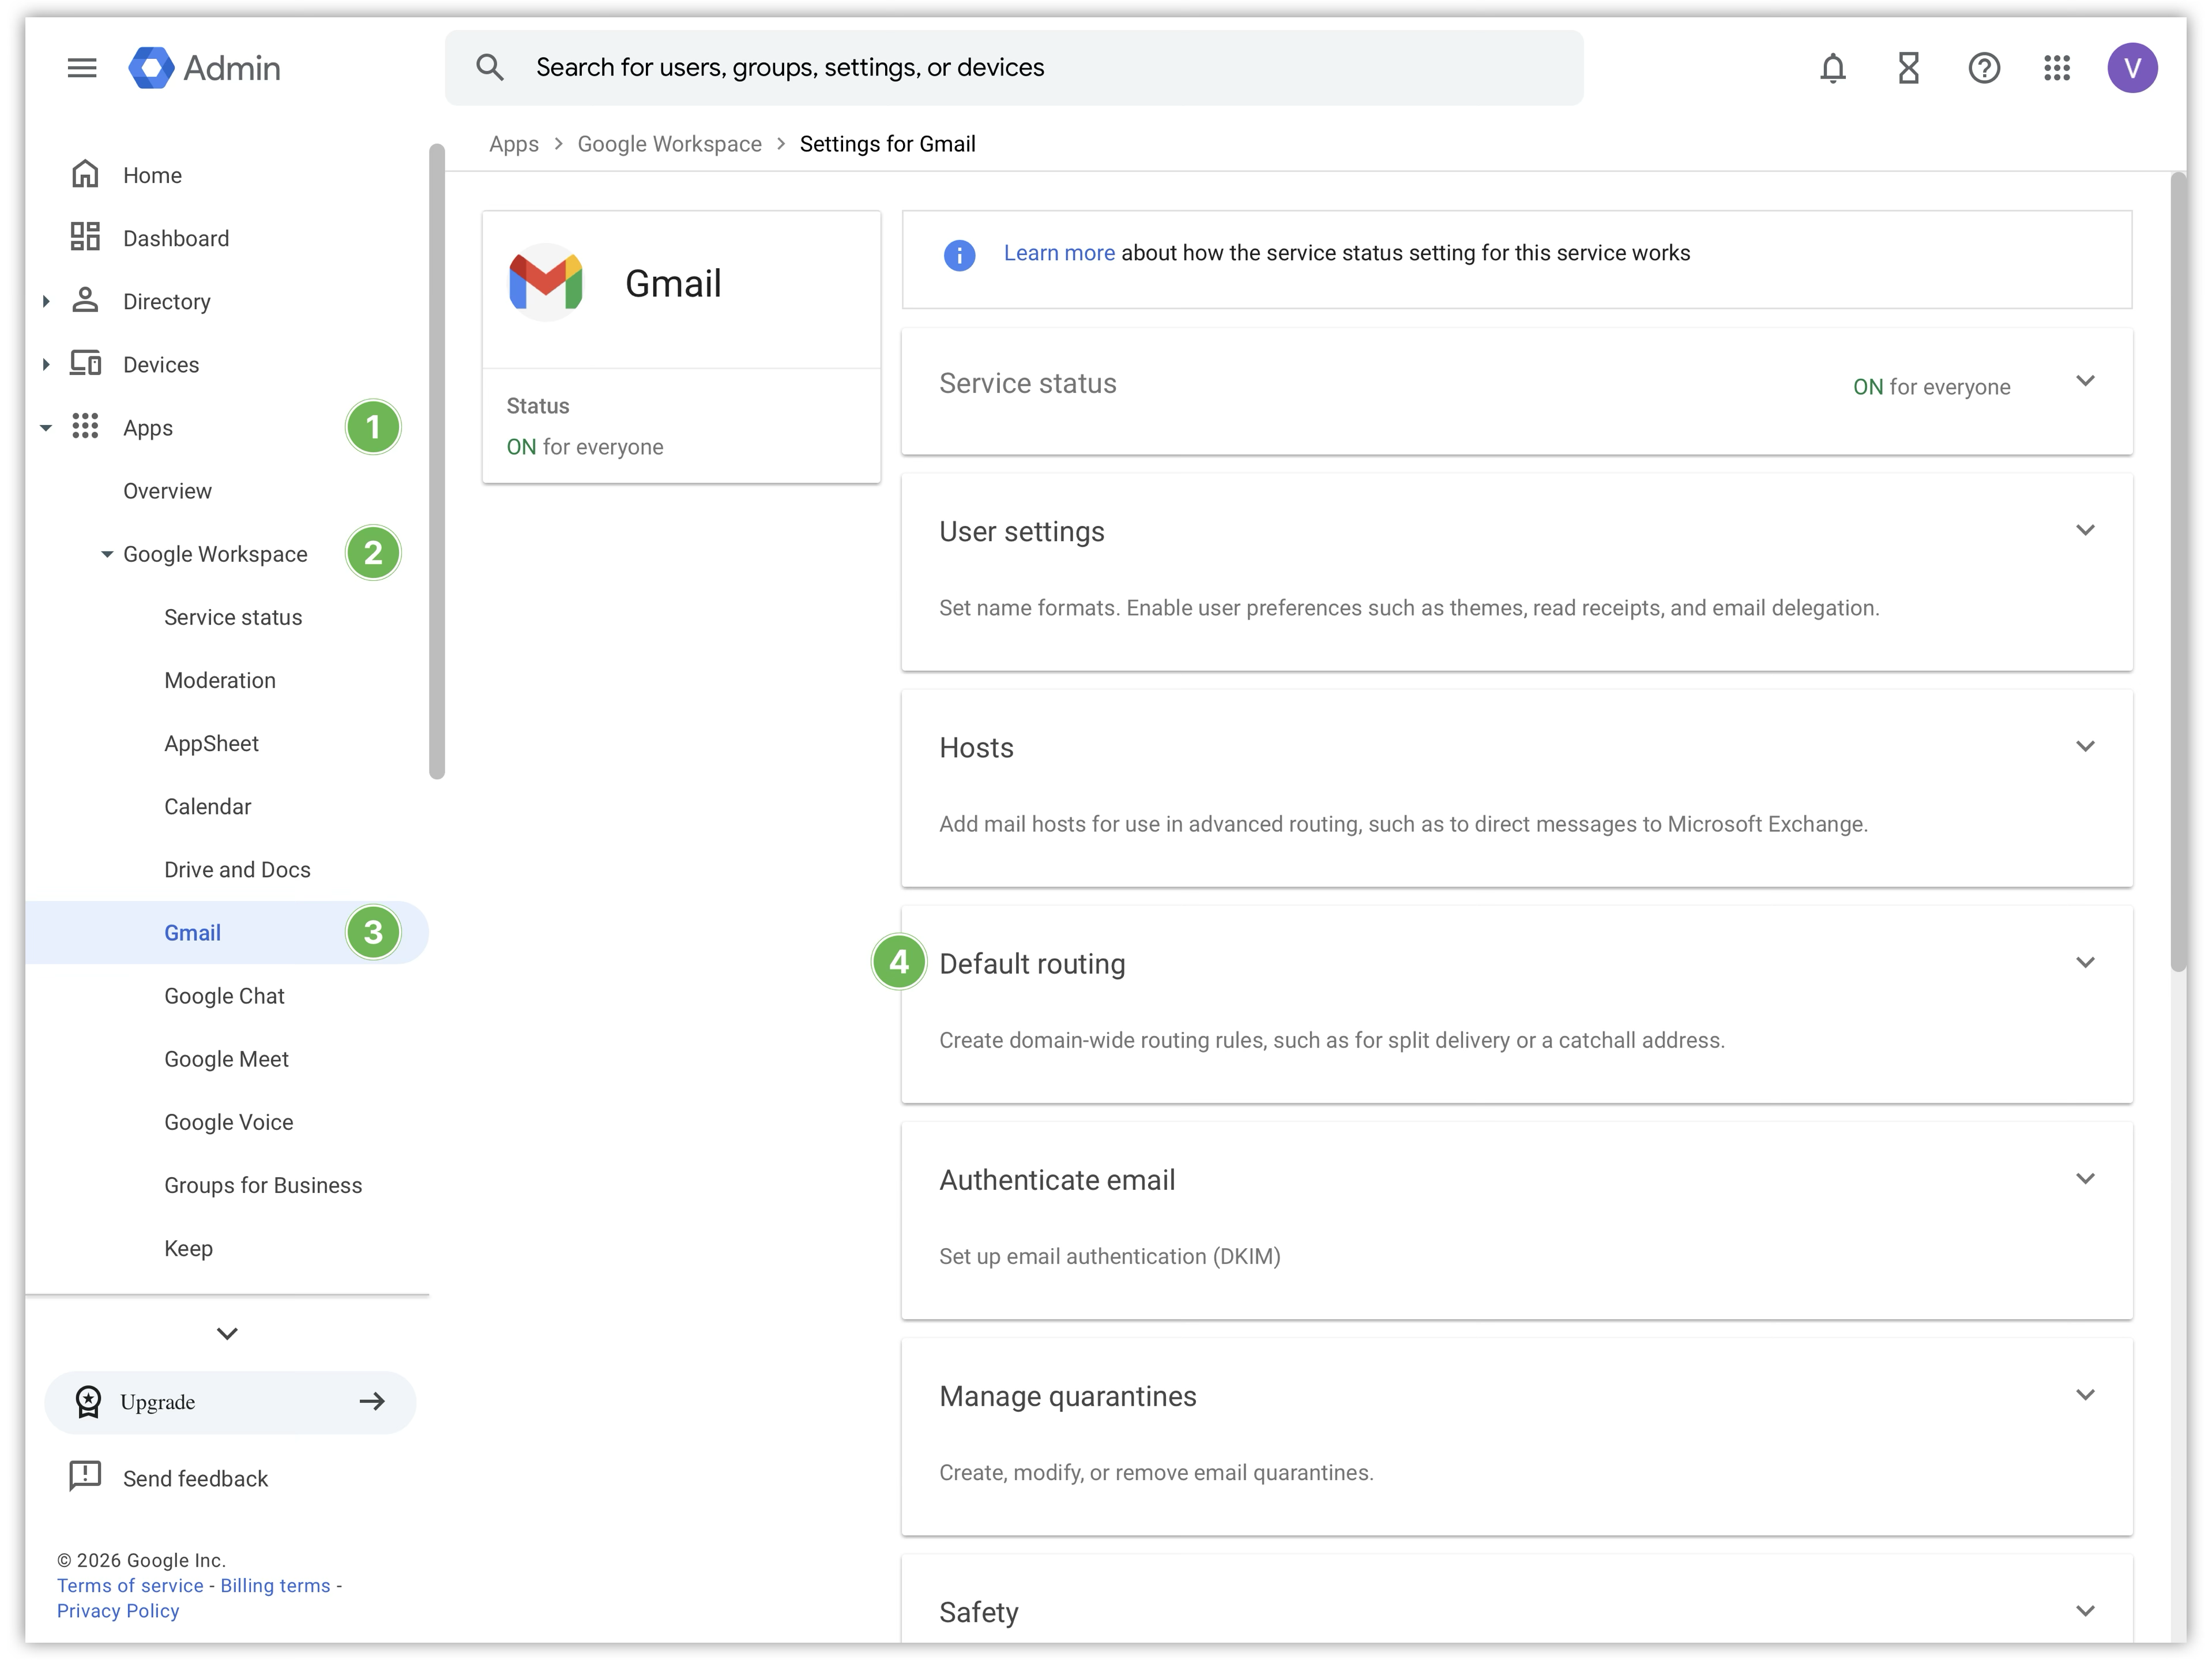
- Click Configure
- In the Add Setting dialog, fill your support email (such as [email protected]) into Email
 field in Specify envelope recipients to match section.
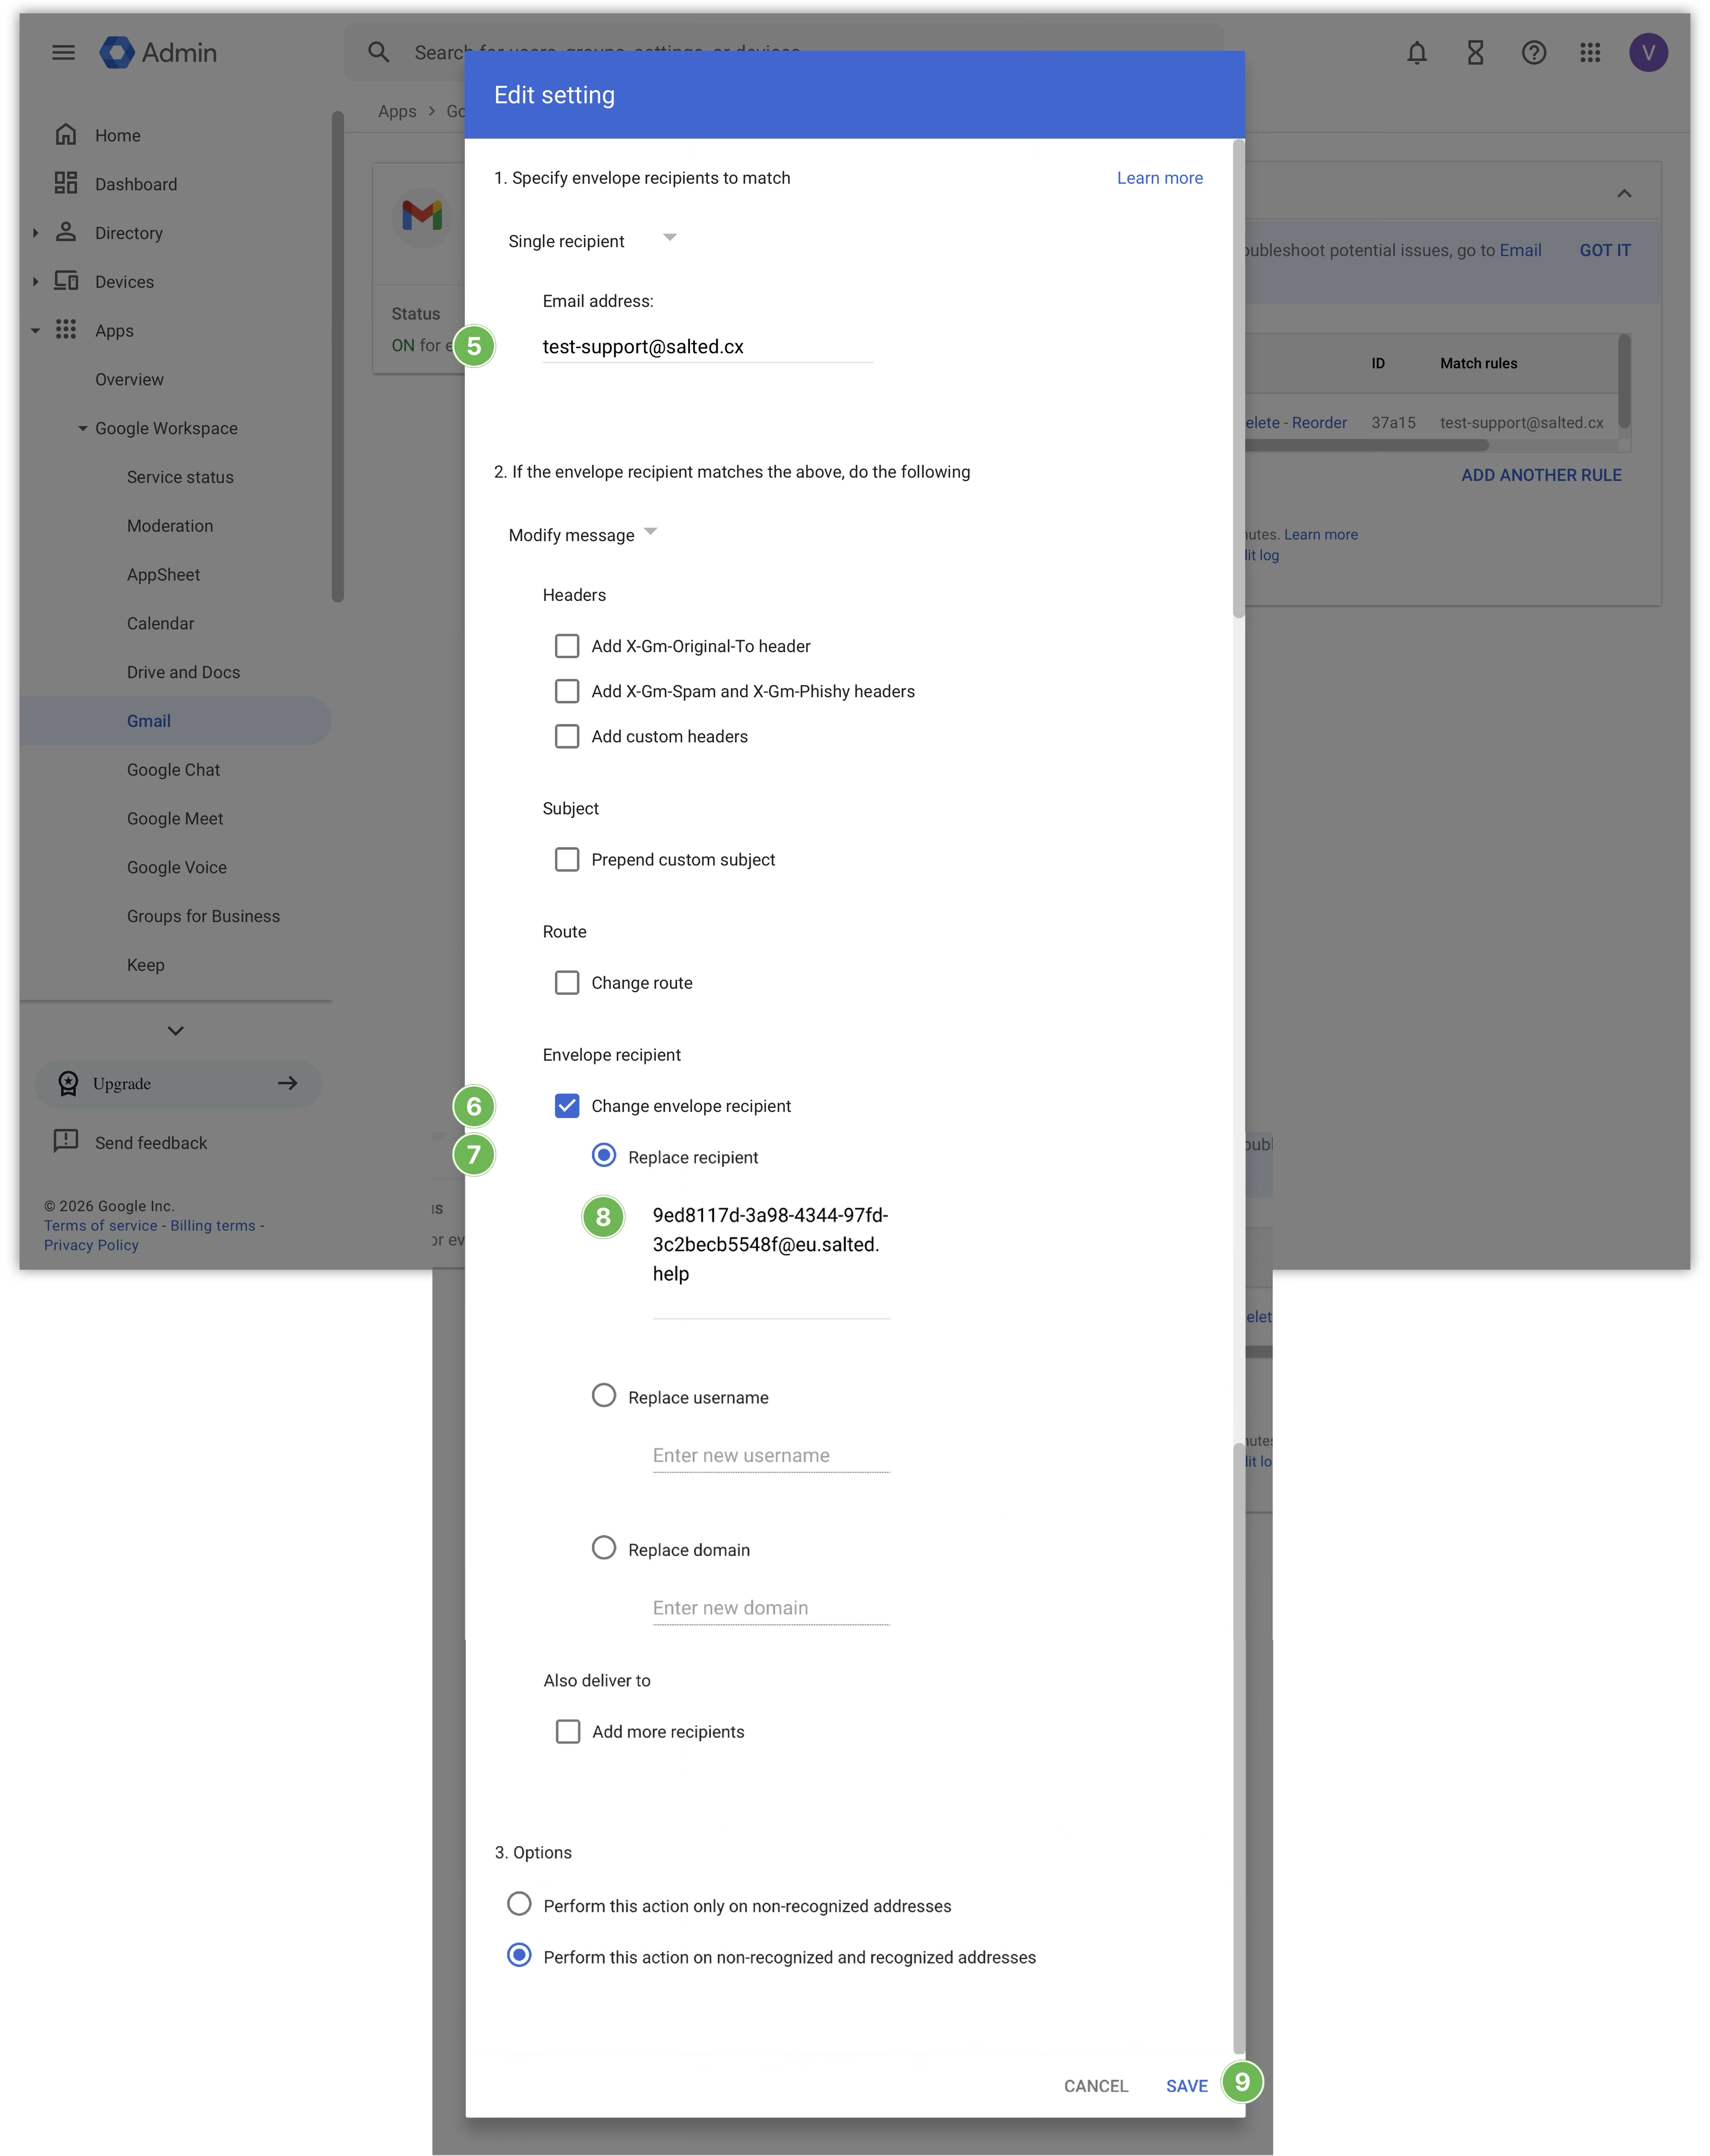
- In Envelope recipient section section check Change envelope recipient

- Choose Replace Recipient
 option.
- Paste your Salted CX email address from brand settings to Enter new email address
 field.
- Click Save
 .
.
- Click Edit on the rule you have just created.
- Make sure that the option in Options section is set to Perform this action on non-recognized and recognized addresses.
You can try sending an email to your support address and check that it ends up in Salted CX. Please note that it may take up to 24 hours for the change to take effect.