Setup Google as Identity Provider
To login using your Google credentials you need to do setup in Google Workspace. You need to be admin of Google Workspace to perform this setup. This setup will let Google know it should enable access to Salted CX and will enable you to assign permissions to individual users.
The setup has the following parts:
- Add Permissions User Attribute. This is done only once per account and adds an attribute that you can use to store permissions that are passed to Salted CX during sign on.
- Create SAML Application. This makes Google Workspace aware your Salted CX account exists and that it should enable sign in to it using Google credentials.
- Set Permissions per User — These steps give individual users permissions to access selected Salted CX features and you need to give these permissions to every user who should have access to Salted CX.
Until you give individual users permissions they cannot access Salted CX. So you can do all the setup without concern that users would get unexpected access to any features or data.
Add Permissions Attribute
You need to add attribute that you can use for storing the permissions the user has within Salted CX. This is done only once per account. You need to to be super admin in your Google organization:
-
Sign in to your Google Admin console
-
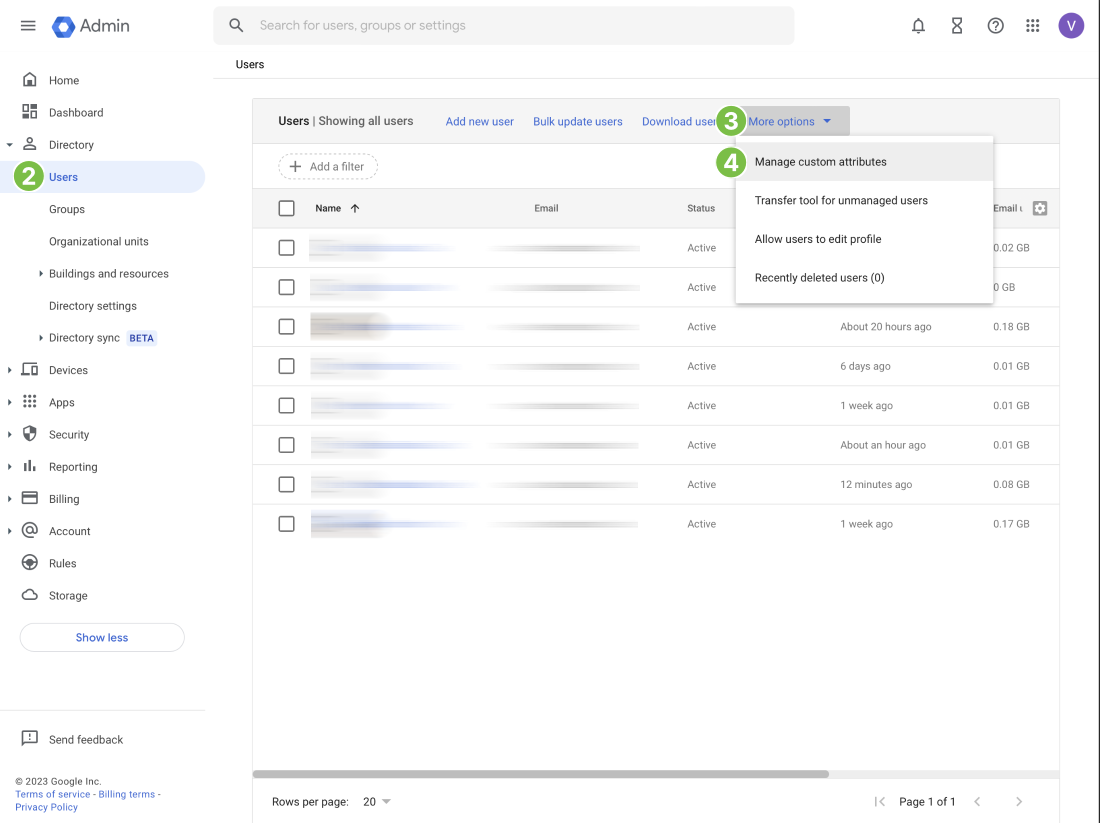
Go to Menu, then Directory, then Users
-
Press More Options
-
Press Manage Custom Attributes
-
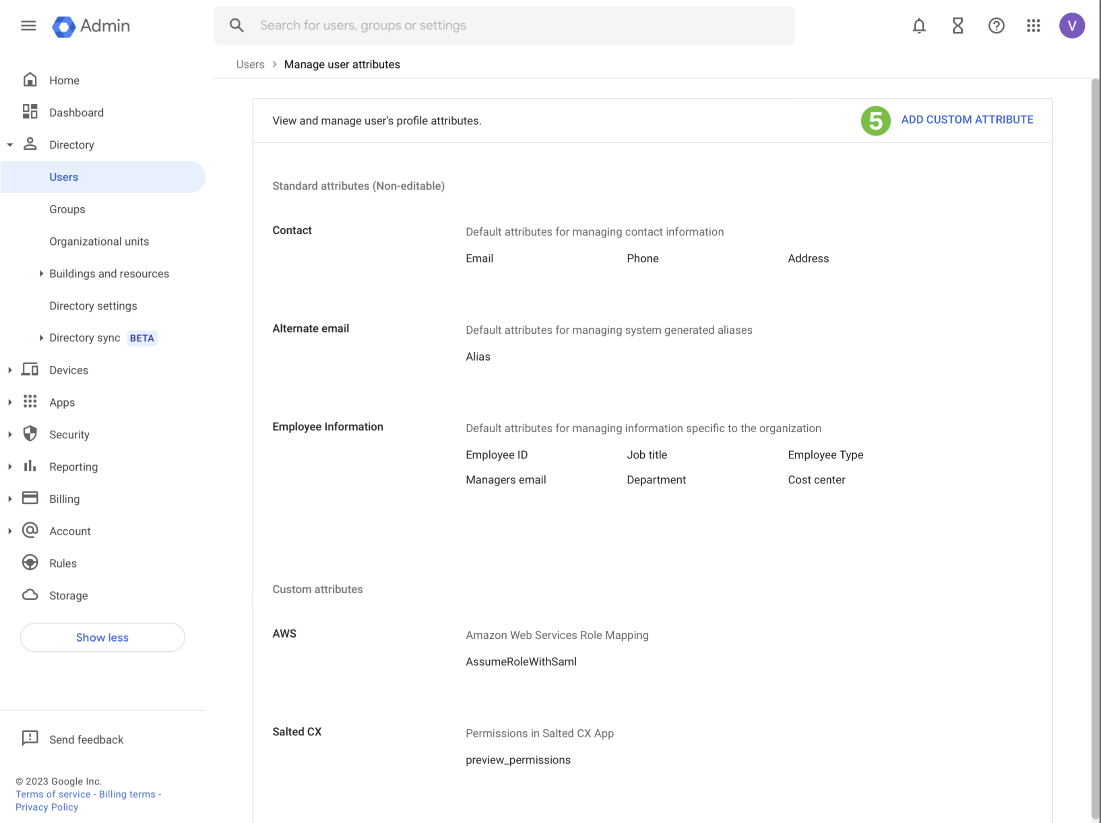
Press Add Custom Attribute
-
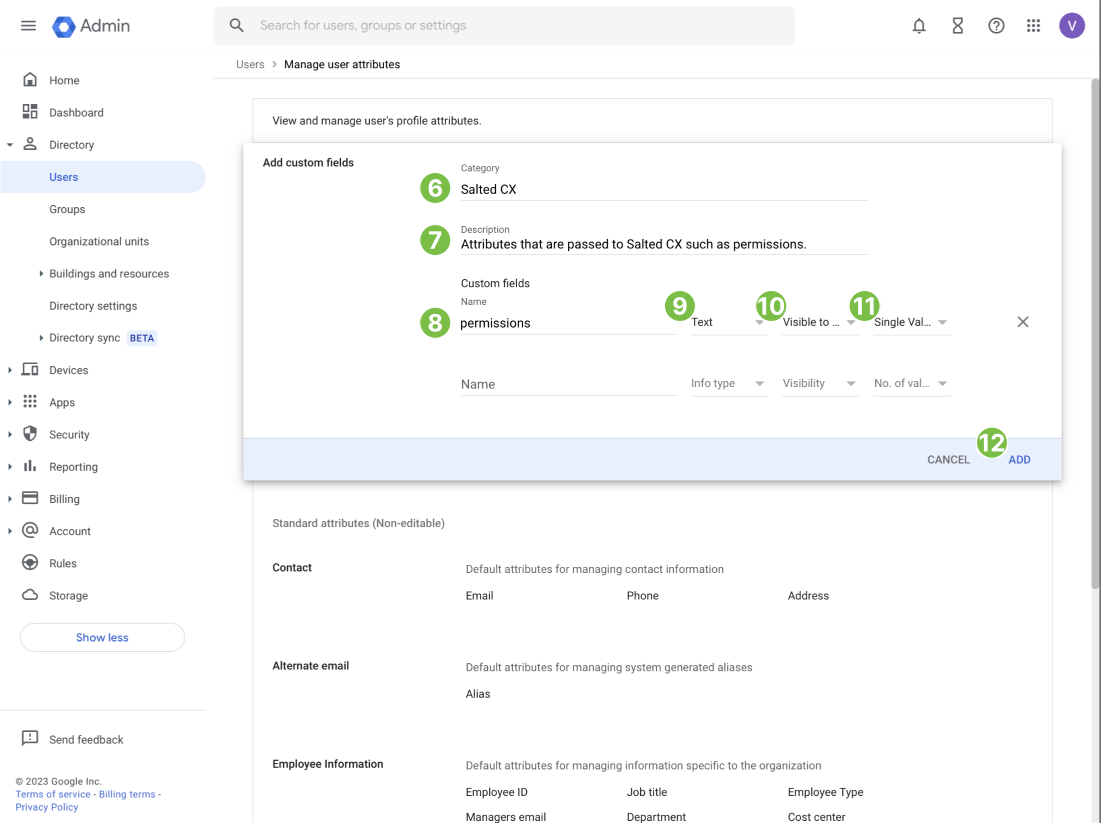
Into Category field fill value Salted CX
-
Into Description field fill Permissions in Salted CX, or any other value that describes well for you the use of the attribute
-
Into Name field fill
permissionsvalue.noteThe Name is not required to be
permissions. We use it for simplicity of this tutorial. You can name the attribute any way you want. For example if you have multiple Salted CX accounts you can have multiple different different attributes with different sets of permissions. Then you can use the name to clearly show to what account the permissions apply. You setup later which permissions are used for the which Salted CX account. -
In Info type leave the option set to Text
-
In Visibility leave the option set to Visible to user and admin
-
In Number of values leave the option set to Single value
-
Click Add
Now you an attribute that can contain user’s permissions for Salted CX. You will need this attribute to add Salted CX as an application to Google Workspace.
More information on custom attributes in Google
Create a SAML Application
You need to be logged as an admin in Google Workspace:
-
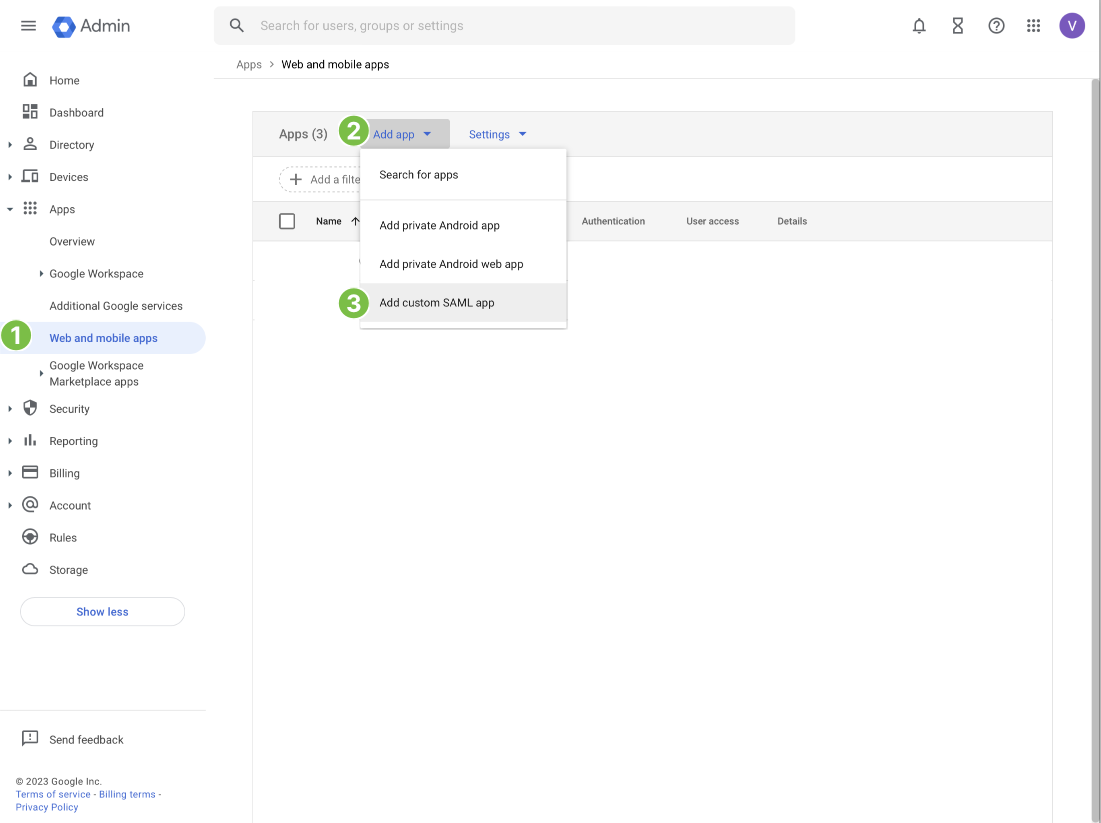
In the left navigation press Apps, then Web and mobile apps
-
Press Add app
-
Press App custom SAML app
-
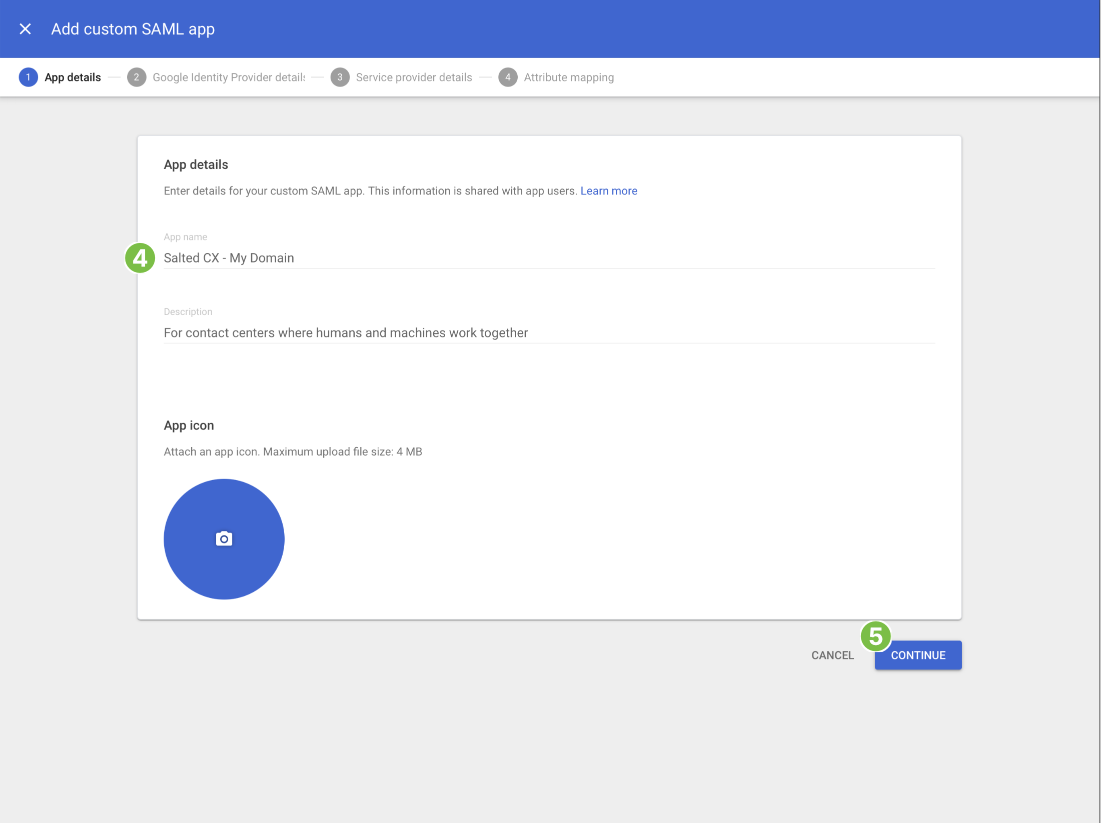
Type in App name. You can name the app any way you want, for example Salted CX
-
Press Continue
-
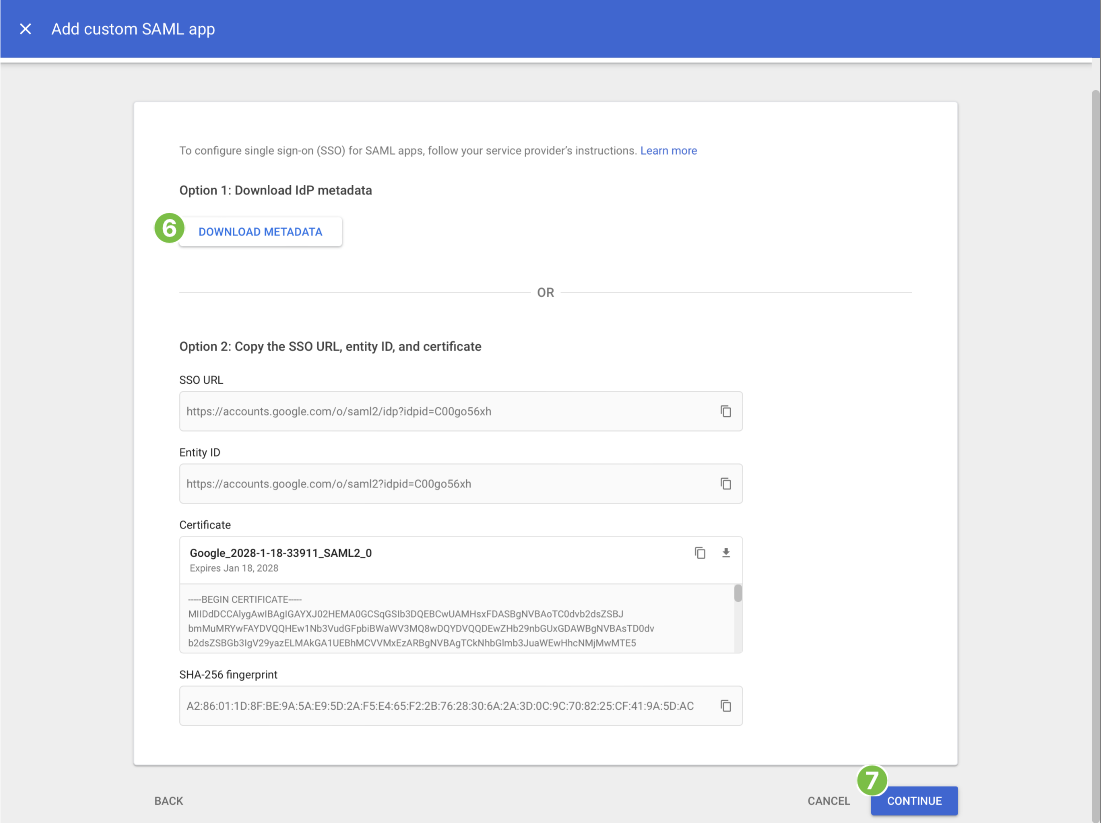
Press Download Metadata and store the file at your computer
-
Press Continue
-
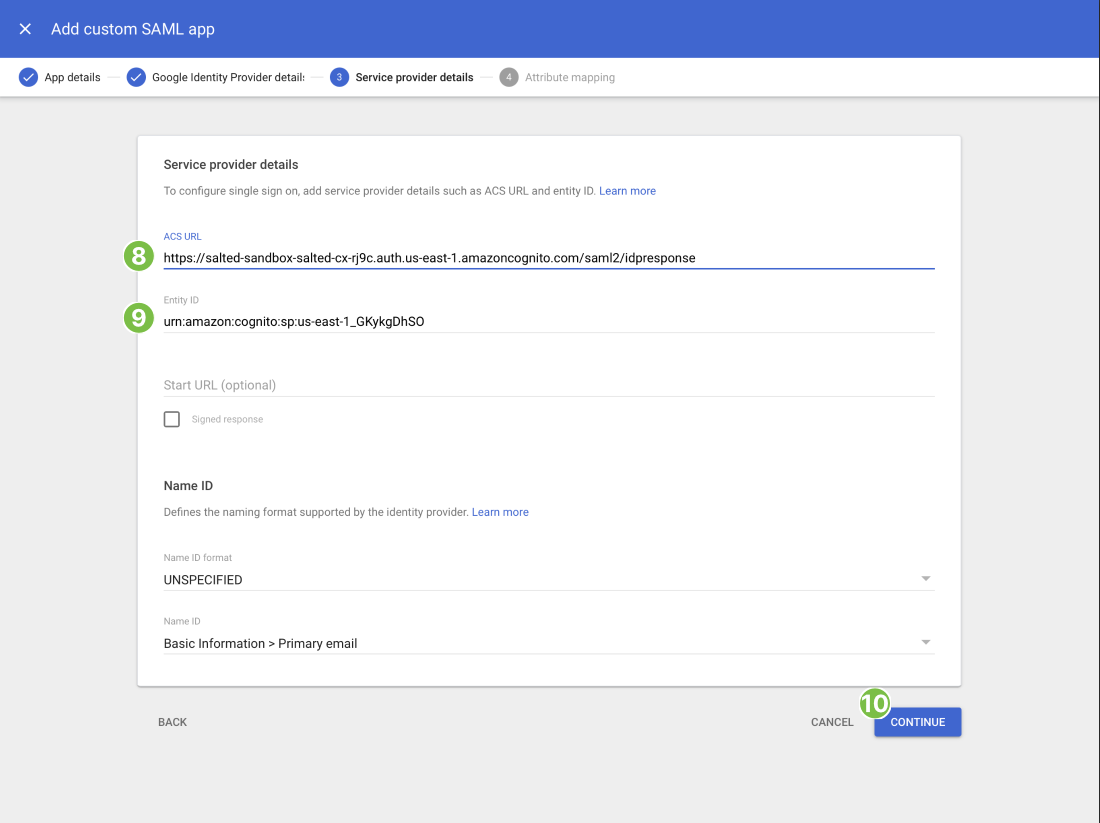
Paste SSO URL from Salted CX to ACX URL
-
Paste Audience URI to Entity ID
-
Press Continue
-
Choose First name in Google Directory attributes and type
given_nameto App attributes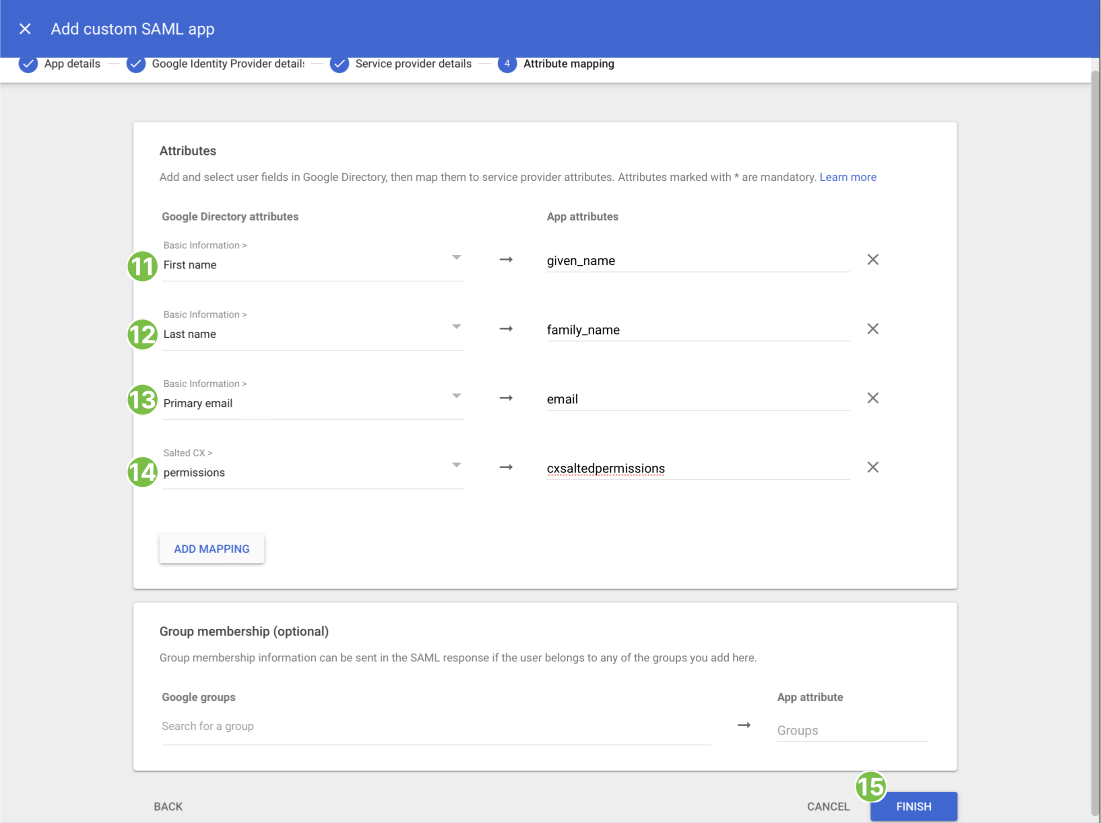
-
Choose Last name in Google Directory attributes and type
family_nameto App attributes -
Choose Primary email in Google Directory attributes and type
emailto App attributes -
Choose permissions (or other attribute that you have created) in Google Directory attributes and type
cxsaltedpermissionsto App attributes -
Press Finish
-
Go back to Single Sign On page in Salted CX settings and paste in the Metadata URL
Enable Salted CX Application for All Users
-
Press User access pane in the application
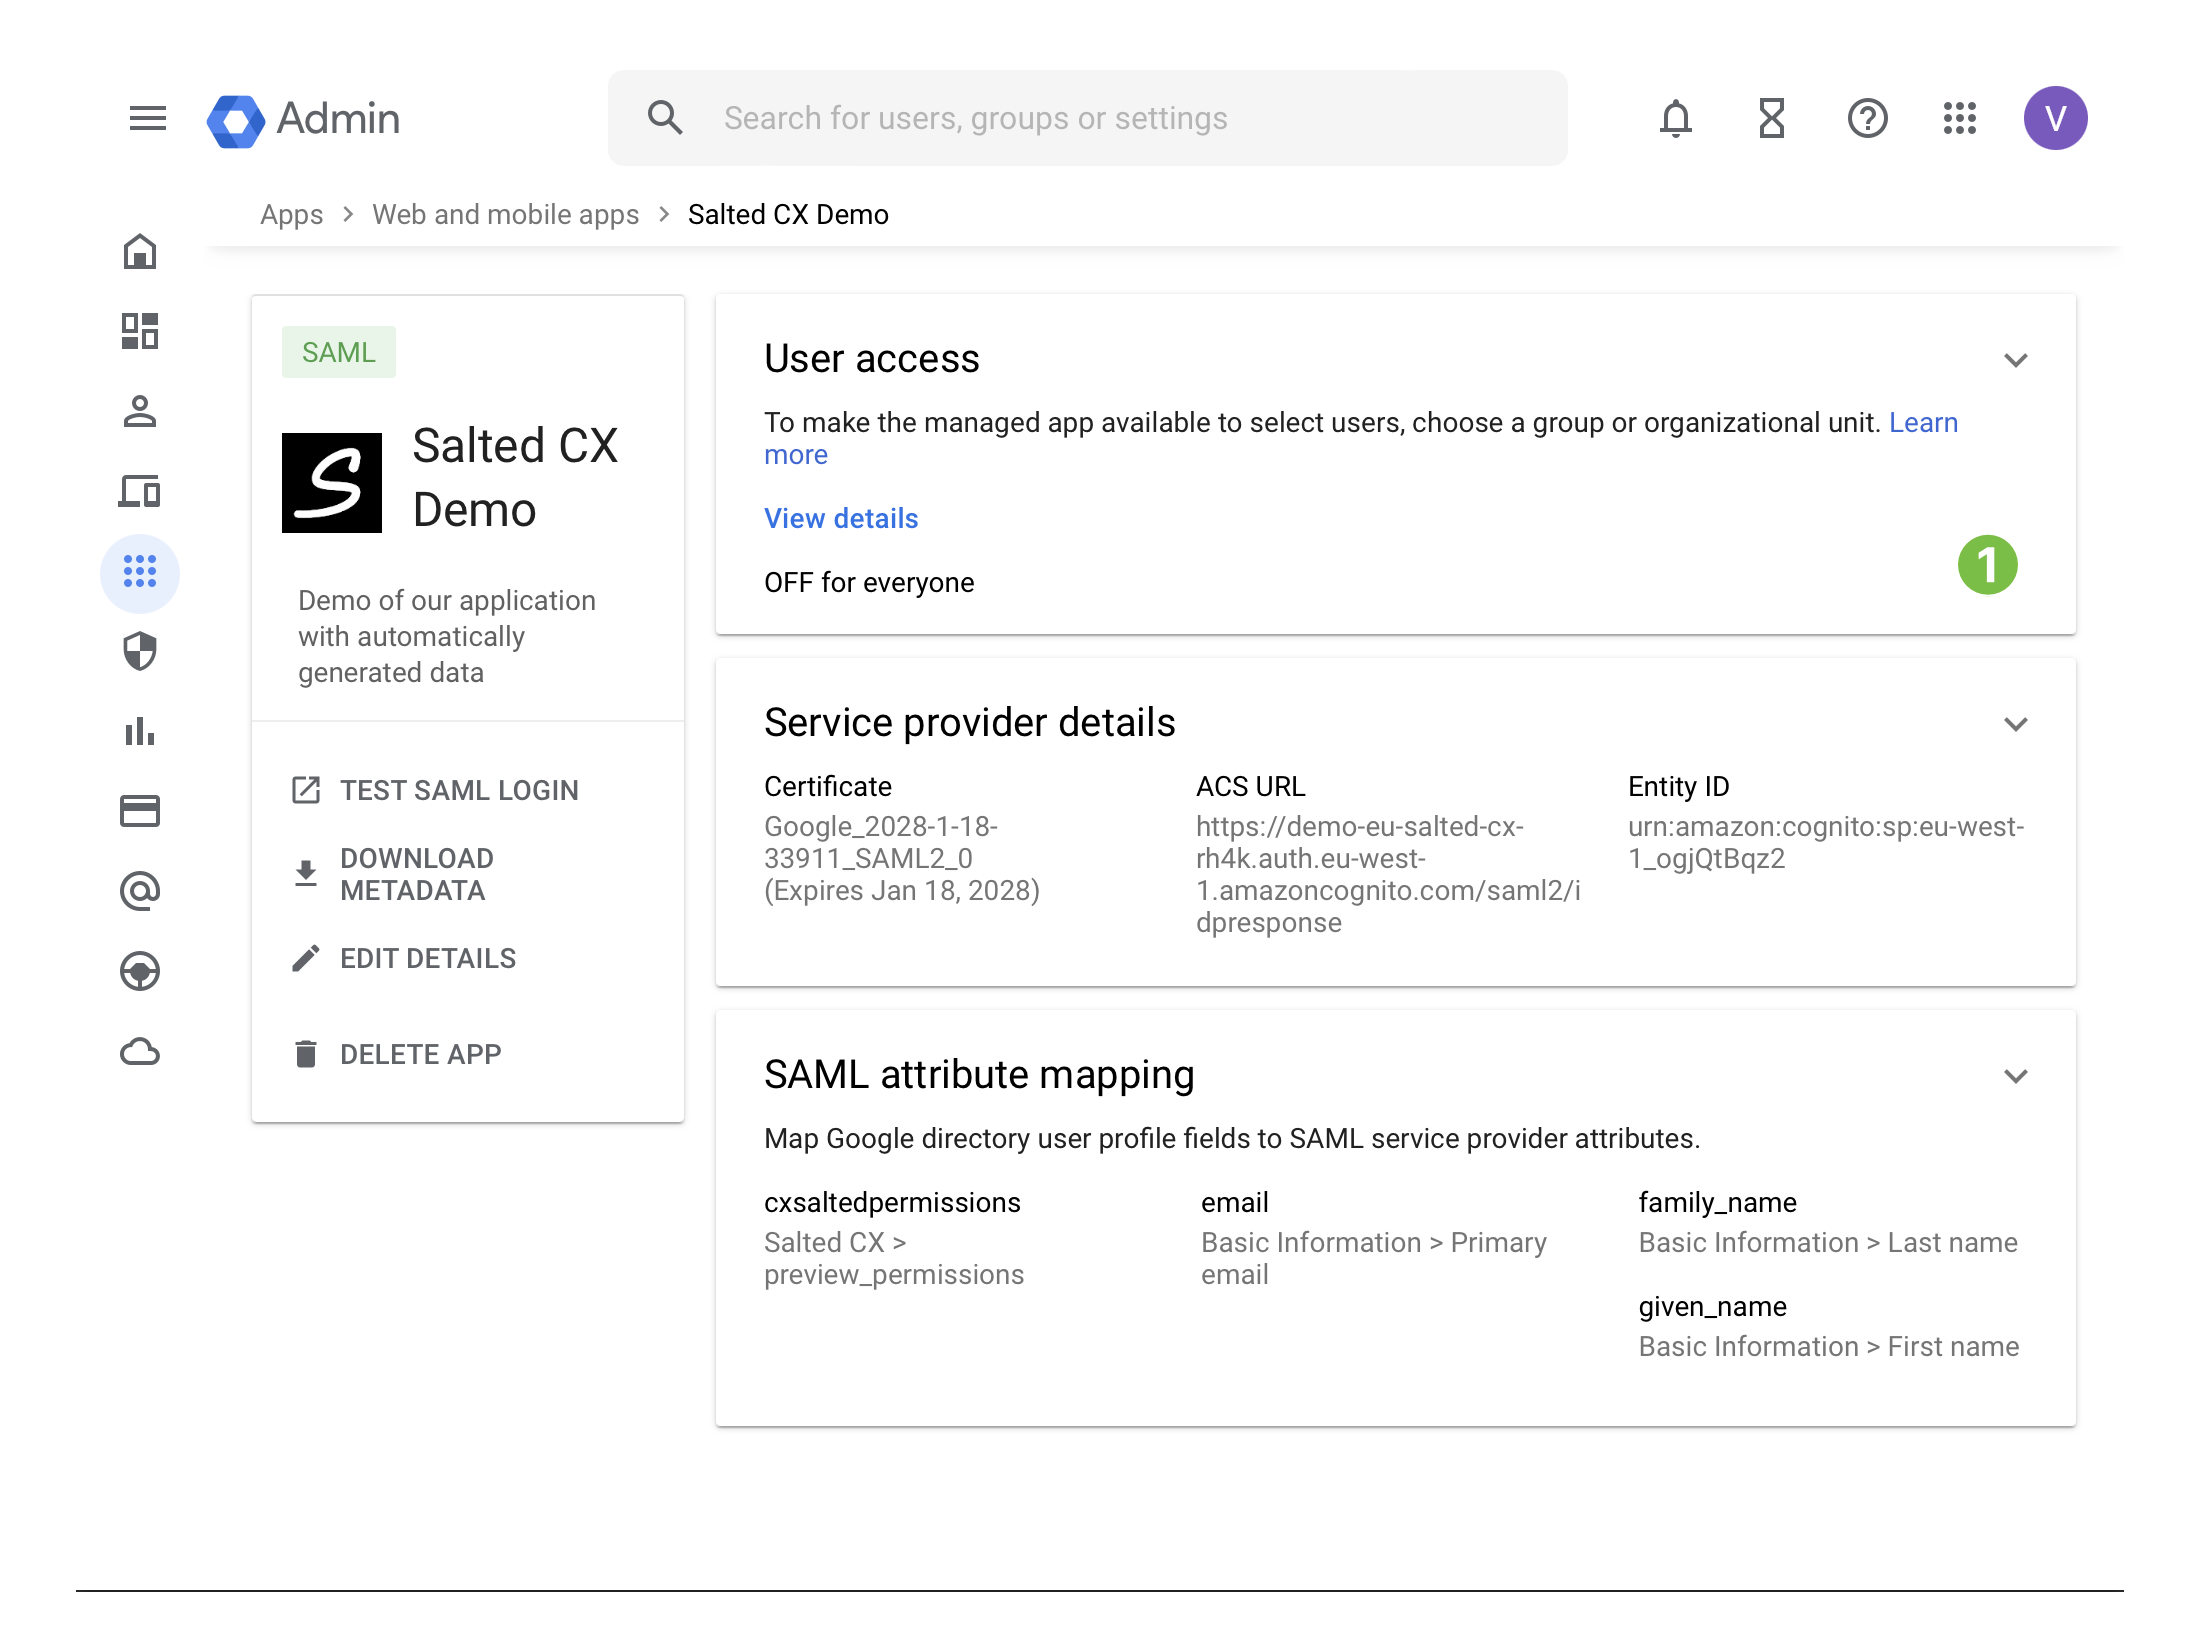
-
Choose ON for everyone
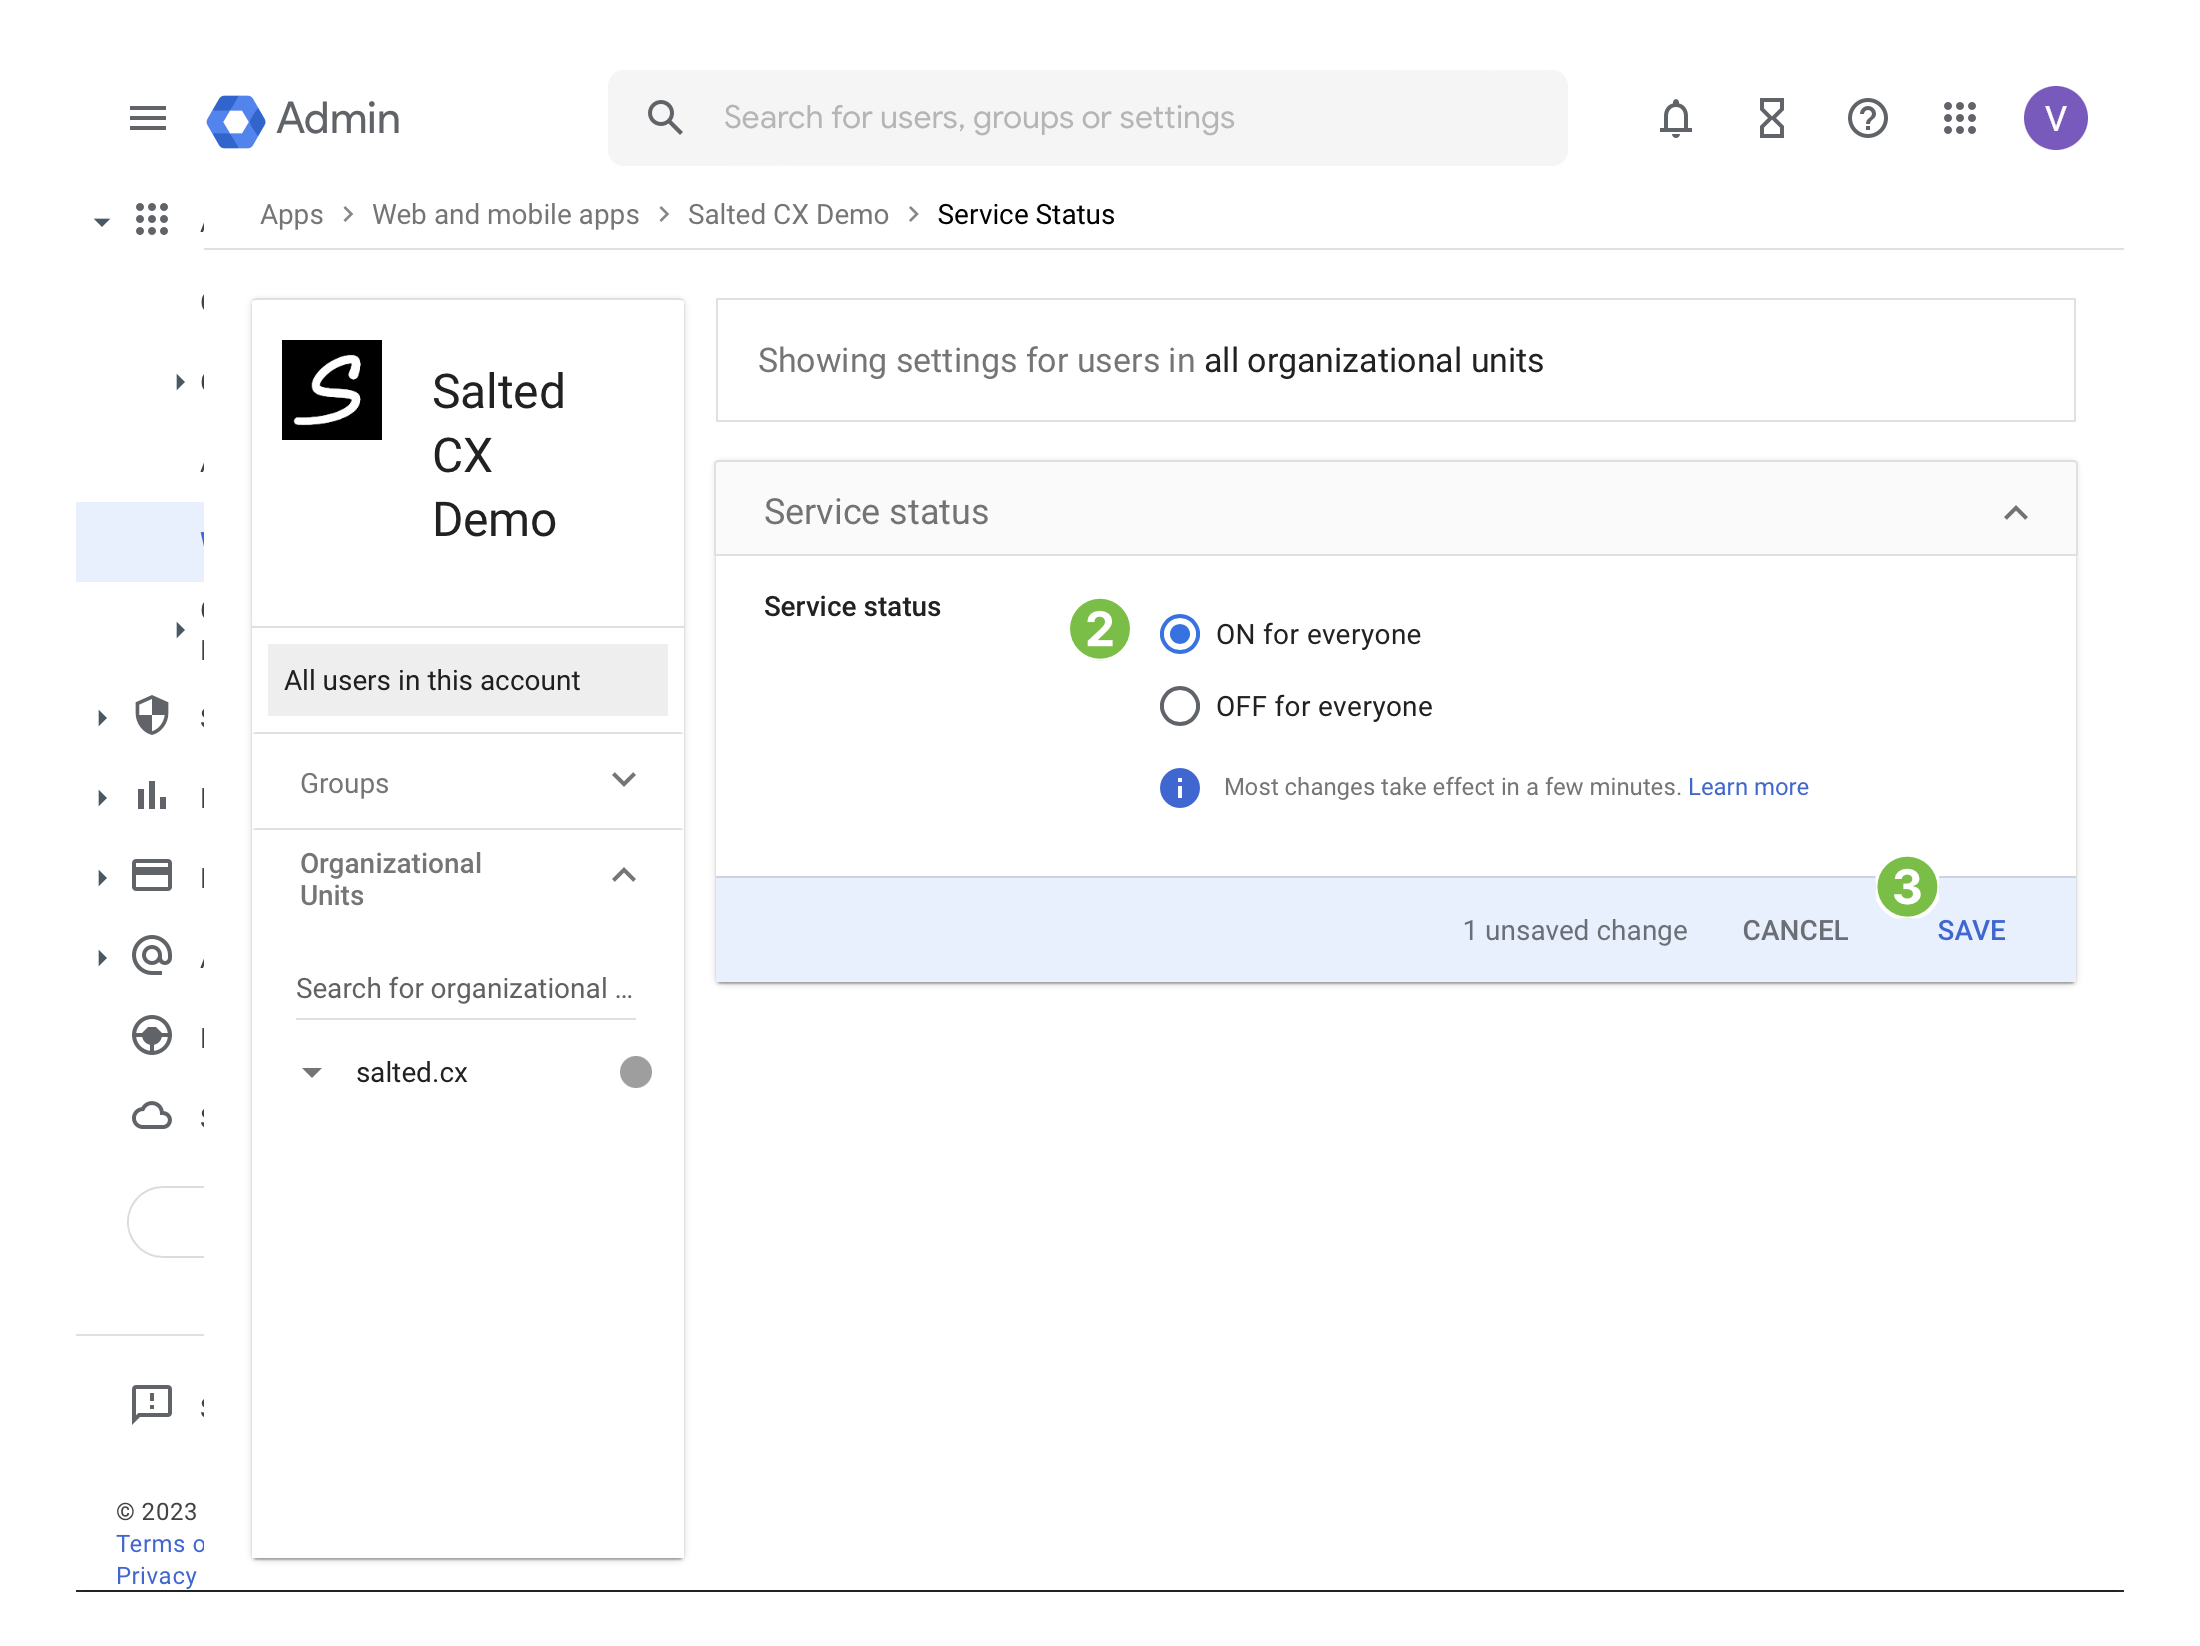
-
Press Save
Currently users cannot open Salted CX from within the Google Workspace app menu. Your users have to go to the Salted CX domain and will be redirected to Google for sign in. This is a current limitation of our single sign on implementation.
Set Permissions per User
You need Update user privilege in Google to set user permissions. This actions are necessary for every user you want to access Salted CX:
- Sign in to your Google Admin console
- Go to Menu, then Directory, then Users
- Find the user you want to set permissions for
- Click the user’s name
- Click User information
- Click the attribute named
permissionsor other name you have used during setup - Set the value of the attribute to the permissions JSON object
- Click Save
More information on setting custom attributes in Google
Next Steps
You might consider making the Setting Permissions per User part of an on-boarding process for new people in your contact center organization. You can use Google API to automate the process.